!!!!! HELP me with my 26" Bafang Rear Wheel Build please !!!!!
- Thread starter bilabonic
- Start date
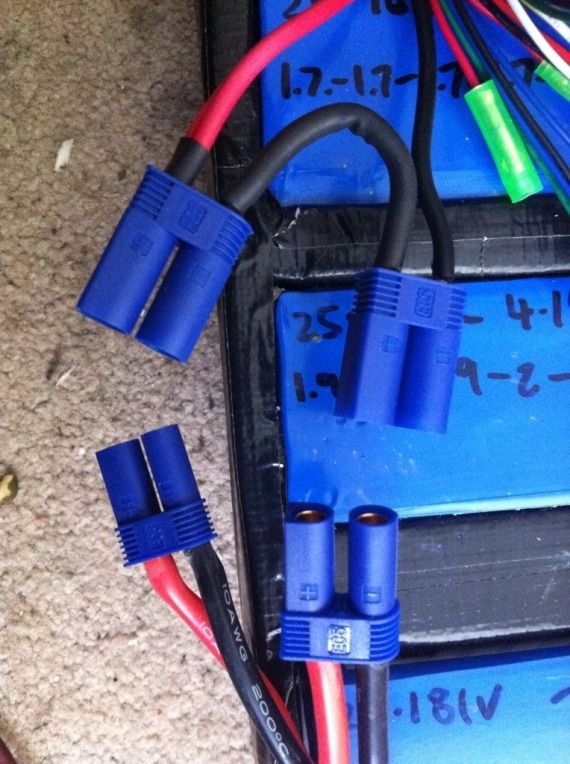
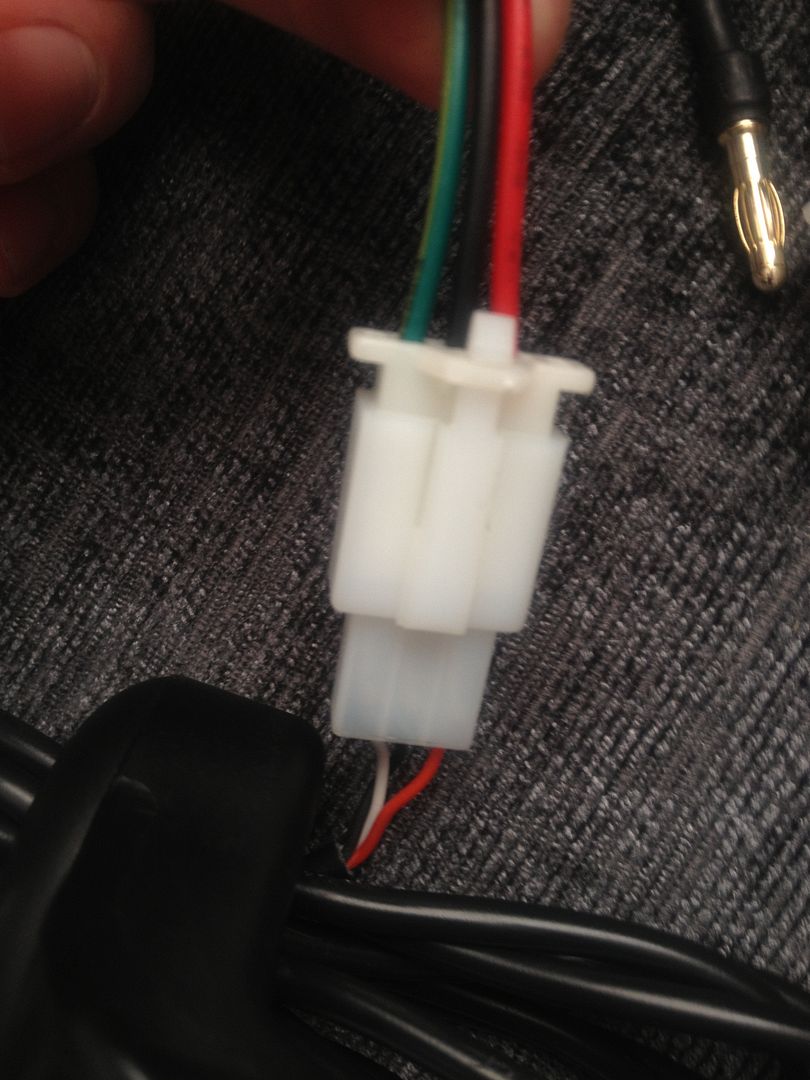
Must of just been current surge i was not expecting, as i have connected them all now and have 50v sitting at controller, just need an input from throttle now.Red black and green is the throttle. I think that the connector's the other way round on the 3-speed switch, isn't it?
The spark and bang you get when you connect the controller to 50v is not like anything else you''re likely to experience as a sparky.
So, are you saying that it was just the spark from the controller, or is something else wrong?
Ideally, you need a pre-charge resistor on your connection because the spark will erode your connectors eventually.
I work on loads of things live when on site upto 415v so used to sparks, watching an 11kv cable or breaker explode know thats a bang.
Still not holding out much hope though.....
Yes, i charged all packs individually and have each cells voltage/resistance.Seems fine. We're all packs charged to the same level?
Before you plug the DB18 parallel harness in, await my PM.
All balanced OK.
Just tried it and it's working ok
No lights on indication on throttle though.
Surprised by the torque of the motor as well...Jeez
Last edited:
When you look at the 6 JST plugs on the small parallel harness, you will notice they are actually 2 x bunches of three JST plugs.
Make sure 1 x bunch of plugs goes to one bank of packs, and the other bunch goes to the other bank.
Does that make any sense at all? Ill draw it out if need be.
Make sure 1 x bunch of plugs goes to one bank of packs, and the other bunch goes to the other bank.
Does that make any sense at all? Ill draw it out if need be.
D
Deleted member 4366
Guest
What throttle do you have with LEDs? If it's the type with a red button, the green and brown are the switch and the yellow's the LEDs
Last edited by a moderator:
I learned that the hard way. Ordered new connectors.When you look at the 6 JST plugs on the small parallel harness, you will notice they are actually 2 x bunches of three JST plugs.
Make sure 1 x bunch of plugs goes to one bank of packs, and the other bunch goes to the other bank.
Does that make any sense at all? Ill draw it out if need be.
No buttons just led indication. Doubt it will be reliable but may as well use it.What throttle do you have with LEDs? If it's the type with a red button, the green and brown are the switch and the yellow's the LEDs
It has a spare yellow cable to connect to controller.
Cheers guys.
Now available in 8 and 9 speed:
Aliexpress.com : Buy New arrival 8 speed freewheel with 11 32T Gear Teeth for road bike, free shipping from Reliable 8-speed freewheel suppliers on CnOutdoor
Aliexpress.com : Buy New arrival 9 speed bike freewheel/11 12 14 16 18 21 24 28 32T/cassette for MTB road bike from Reliable bike freewheel suppliers on CnOutdoor
Right, going to have a go at fitting the back wheel today, i have 'popped' it in upside own with derailler off and disc brake off.That controller's bad. The pcb should be in the slot on the side opposite the FETs, but not in the FET side. You have to take out the three screws in the side to extract it.
The tyres should be OK. If you want best performance, Schwalbe City Jets 26 x 1.95 are good, but not puncture proof.
Your first job is to try-fit the back wheel. The anti-rotation washers go on the inside of the drop-outs. Check whether the rim's central. If not, you have to dish it. Even if you don''t need to dish it, you have to check and tighten the spokes. For that you need a 13G spoke key. The ones BMSBattery sell are pretty good. You can get similar ones on Ebay, but it's a bit of a lottery how good they fit. Just thought. Don't dish it 'til you've sorted the free-wheel. See below.
Next thing to think about is a cobalt drill to drill the torque arm. Either get a set (always useful) or at least 3mm and 5mm. They're fairly cheap on Ebay, but make sure you get 5% cobalt, not cobalt coated.
Don't waste your time with the pedal sensor. It'll be too fierce. Maybe later think about one of those £60 750w Conhismotor controllers with LCD display and variable PAS.
You might have trouble fitting those throttles. If you do, I've got the small thumb throttle that fits. I ordered a couple as spares with my last battery.
The 14T free-wheel will be too low. You might as well order a 11T one from Cyclezee now. It'll save a lot of messing about later. I think he has two types. The DNP one needs spacers, so you might be better off with the other one whatever it is. Ask John to check the stack-height. The 7 speed BMSBattery one is 35mm and requires two washers as spacers. The DNP one is 39mm, so as well as needing a 6mm spacer, it'll be a tight squeeze to fit it between your drop-outs.
Which battery did you get?
So i use the spacers that fit the axle directly to centralize wheel.
Not sure about the torque arms as they are alu, are they upto the job ?
Will get a pic up and soon.
Cheers
D
Deleted member 4366
Guest
The torque arms that you indicated in post #1 are very hard stainless steel, and perfect for the job.
No, you don't use spacers to centralise the wheel. You should start with the disc and caliper assembled otherwise you might have to do it all again when you find that you can't get your caliper to line up with the disc.
The anti-rotation washers go on the inside of the drop-outs. Normally with only that on the axle on the disc side, the disc is in the right position to clear the frame and match the caliper range of adjustment. If the disc touches the frame, you can add a washer behind the anti-rotation washer, but you'll probably also have to put washers between your caliper mount and the caliper/adapter.
DEpending on the stack-height of your free-wheel, you'll probably need to add spacers to the axle to keep the top gear away from the frame. A six-speed doesn't need spacers, a seven speed needs two washers, A DNP 7 speed needs about 6mm of something, and I guess the 8-speed ones need something more. Once you have the wheel spaced like that, you can then check whether the rim is central, which it probably won't be, so then you need to dish the wheel by going round the rim loosening all the spoke nipples half a turn on the disc side, and tightening all the nipples half a turn on the other side. You need to be precise and systematic when you do that. Don't lose count or where you got to otherwise you'll have a lot more work to do to get the wheel true. When you do it, you'll notice that they never got the spoke tension right in the first place. Worry about that after you dished the wheel to get the rim in the right position.
It's best to do all this with the free-wheel that you intend to use permanently, otherwise you'll be doing it all again later. If you just want to get the bike going, it's ok to leave the wheel a bit off centre to try it out, and then centralise it properly when you get your 11T free-wheel. You'll soon get fed up with the 14T free-wheel.
Last edited by a moderator:
Using a 7 spd cassette, wheel is not to bad, quite central.
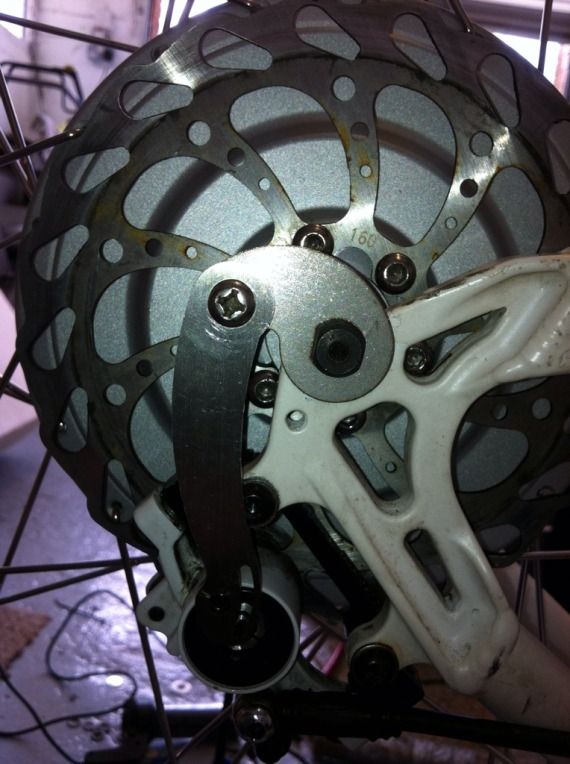
When i have the lock washer and one slim washer on disc side it rubs to the right of caliper -
When i put another washer in it moves disc to far to the right in the caliper -
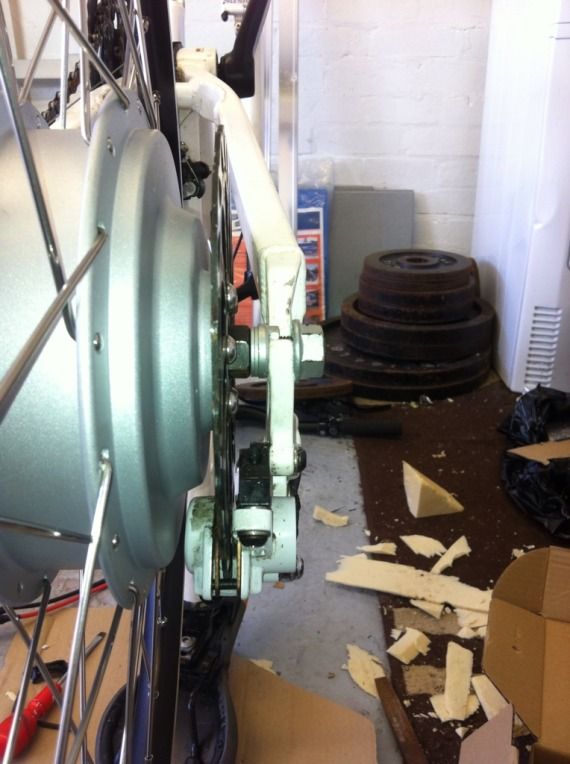
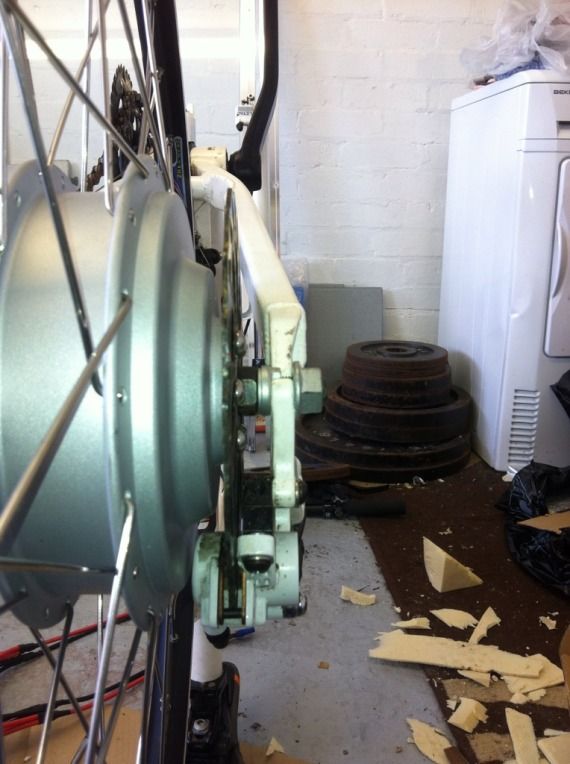
I have the one thick washer on cassette side and it's just clearing the frame -
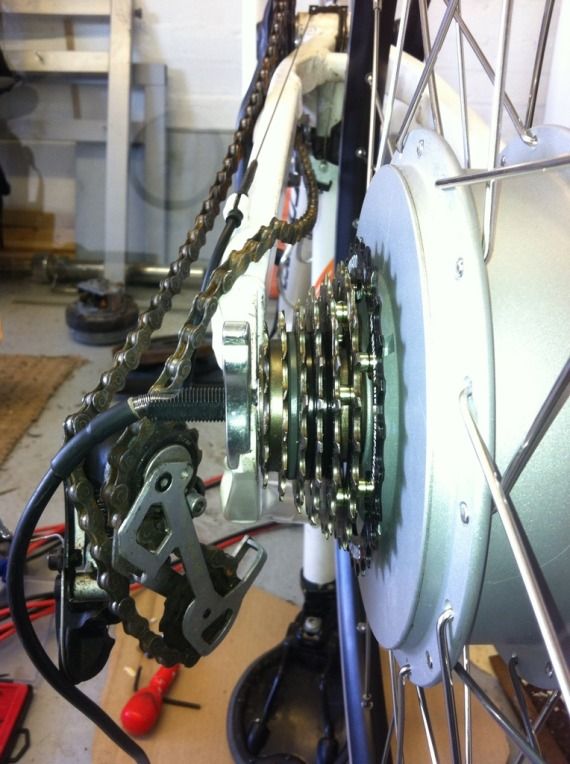
Need a thinner washer i think ?
When i have the lock washer and one slim washer on disc side it rubs to the right of caliper -

When i put another washer in it moves disc to far to the right in the caliper -

I have the one thick washer on cassette side and it's just clearing the frame -

Need a thinner washer i think ?
D
Deleted member 4366
Guest
The caliper is adjustable for sideways movement. Just loosen the two screws, hold the brake on, and re-tighten them to centralise it. It's only when the screws reach the edge of the slots that you need washers.
On the free-wheel side, the top gear looks too close to the frame. You need a bit of room for the chain. Maybe it's just the photo.
On the free-wheel side, the top gear looks too close to the frame. You need a bit of room for the chain. Maybe it's just the photo.
Fitting ok now, thought they were fixed.
I know have a thin washer/lock washer on caliper side and thick and thing washer on derailleur side.
Wheel is not perfectly central with frame though.
Is the axle the correct way up ? I have so the cable can face down when it exits as a drip loop.
I know have a thin washer/lock washer on caliper side and thick and thing washer on derailleur side.
Wheel is not perfectly central with frame though.
Is the axle the correct way up ? I have so the cable can face down when it exits as a drip loop.
D
Deleted member 4366
Guest
That's right. Cable goes down, or your motor ends up like this:Fitting ok now, thought they were fixed.
I know have a thin washer/lock washer on caliper side and thick and thing washer on derailleur side.
Wheel is not perfectly central with frame though.
Is the axle the correct way up ? I have so the cable can face down when it exits as a drip loop.
http://www.pedelecs.co.uk/forum/electric-bicycles/10532-dirty-rusty-bafang-hub.html
Jeez, is there anything extra you can add to waterproof it ?
What about clear silicone/shroud/self amalg tape ?
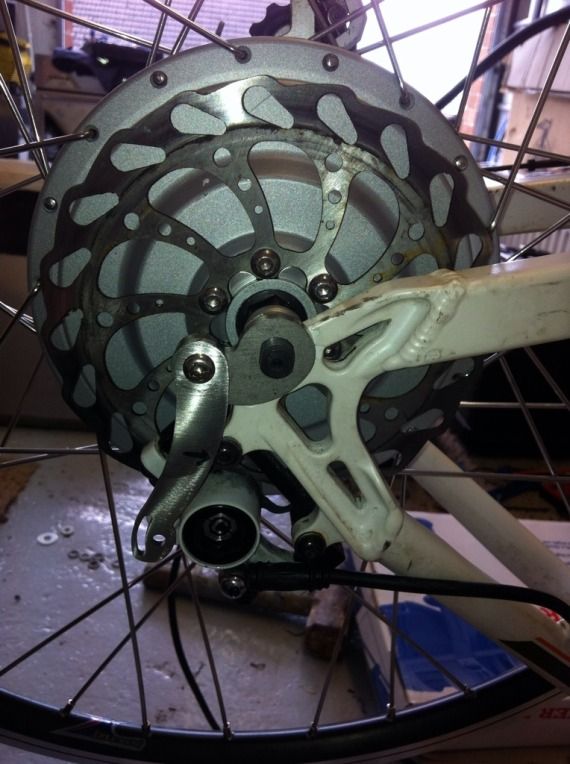
Here is how i intend to fit torq arm, i will need a couple of spacers between arm and frame to take up the thickness of the main torq arm piece. Probably need a longer M5/M6 brake caliper bolt as well.
What about clear silicone/shroud/self amalg tape ?
Here is how i intend to fit torq arm, i will need a couple of spacers between arm and frame to take up the thickness of the main torq arm piece. Probably need a longer M5/M6 brake caliper bolt as well.

Related Articles
-
 MTF Enterprises announces acquisition of EMU Electric Bikes
- Started by: Pedelecs
-
 Wisper 806T folding bike wins Which? ‘Best Buy’
- Started by: Pedelecs
-
 Sustrans calls for protected cycle lanes
- Started by: Pedelecs
-
 Amazon launch their first UK e-cargo micromobility hub
- Started by: Pedelecs


