Swapping male / female terminals on battery and charger

103Alex1

Esteemed Pedelecer
Sep 29, 2012
2,228
67
No, water got into the battery case & shorted the bottom cells. I had mounted the battery low down on the front of the diagonal, on the bouncer, and water must have splashed up from puddles. It wasn't even a wet day, but there you go.
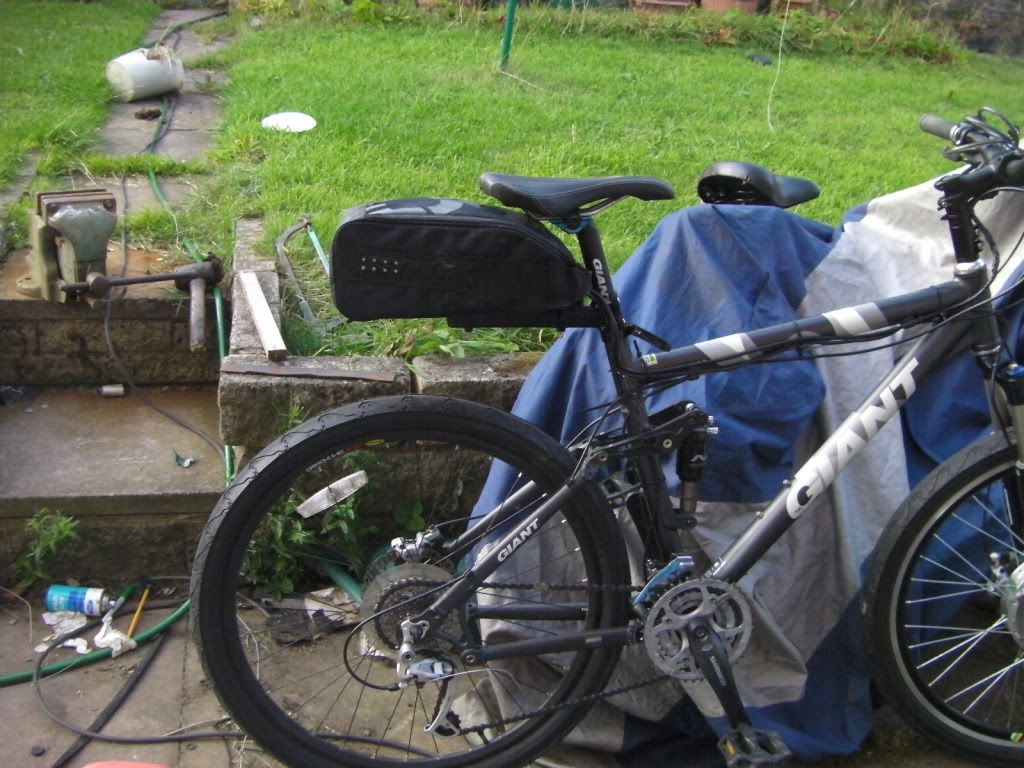
I now have a frog right up tight under the saddle. (It gets wet down here, too)
That's rotten luck. We always think of waterproofing against rain coming down, but the biggest risk is water splashing up from puddles when the rain's stopped ! It's the same with trying to keep your feet dry. It's very helpful feedback though and thanks - I'm now going to site my controller in the front of the triangle near the handlebars where it's higher and well away from any drainage holes, rather than down low under the battery near the lowest point. It always niggled in the back of my mind that it would be risky to put it there.

I can shield the battery completely with its supporting baton inside the box, feed the waterproofed charging socket through a hole in the baton to its position on the box edge below and stuff plastic in the hole to keep the battery completely dry from any risk of water splashing up. Box internal design definitely taking shape now with that info ! :)

I wish the battery manufacturers in China would put longer leads on their batteries!! It's crazy they put like 5-10cm of cable and a big kettle connector eh!
I know - it caused me no end of head scratching when I first received it as it's so restrictive in terms of how far the controller can be from the battery. It works out fine on a triangle box though - just means you need to orient the battery towards the socket outlet and have that close, and you can make your controller lead any length you like. That's one of the main reasons why I changed the kettle plugs to Deans on the battery / controller interface, in order to make it easier to take the connection off to the controller without a huge kettle plug to accommodate.

Very neat job! You have the exact same charger and battery as me :D Is that a 10ah?
Thanks. My battery arrived about 3-4 weeks ago along with the rest of the parts. It's a 36v 20Ah and is rather large ! I think the chargers are all in the same housing but there are red dots on the label indicating which voltage battery they are for and what Amps correspond viz charging speed. If you have a 36v battery from them it'll most likely be the same charger I guess.
 
Last edited:

103Alex1

Esteemed Pedelecer
Sep 29, 2012
2,228
67
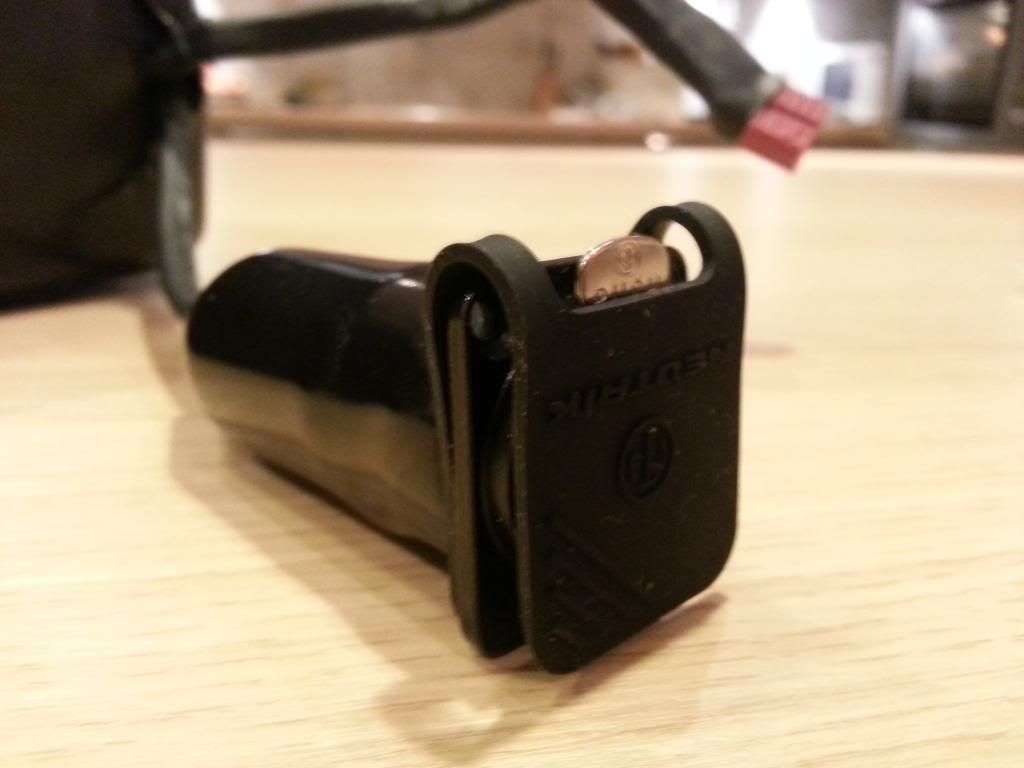
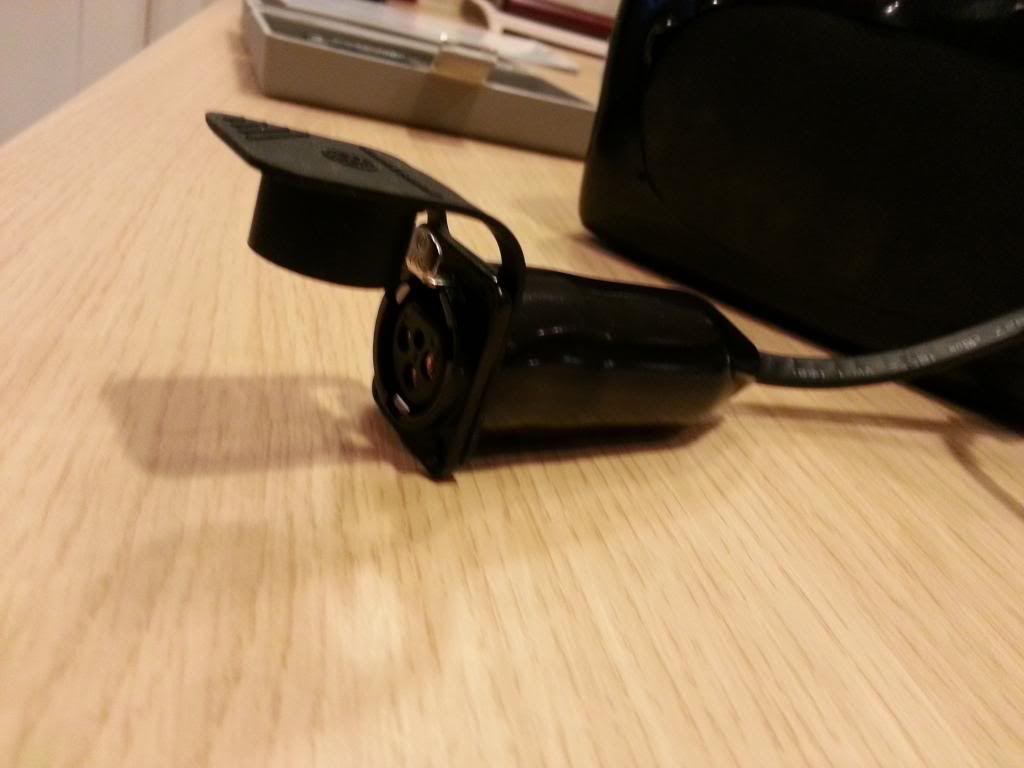
Final cover option arrived today & mocked up ...


Jury's still out. I'll keep them all and decide when I build in. Only about a quid each anyway. The whole assembly came to about £14 (plus an astronomic £6 postage from Canford for a few grams of bits (!) - being the only people I could find selling the female socket in that version with stock). Wasn't cheap but the waterproof boot for the socket clinched it for me due to proximity of siting to intended drainage hole and risk of water splash-up. Baulked a bit at first but they're undeniably high quality components & so I guess charging efficiency should hopefully be good too.
 

morphix

Esteemed Pedelecer
Oct 24, 2010
2,163
119
Worcestershire
www.cyclecharge.org.uk
That's rotten luck. We always think of waterproofing against rain coming down, but the biggest risk is water splashing up from puddles when the rain's stopped ! It's the same with trying to keep your feet dry. It's very helpful feedback though and thanks - I'm now going to site my controller in the front of the triangle near the handlebars where it's higher and well away from any drainage holes, rather than down low under the battery near the lowest point. It always niggled in the back of my mind that it would be risky to put it there.

I can shield the battery completely with its supporting baton inside the box, feed the waterproofed charging socket through a hole in the baton to its position on the box edge below and stuff plastic in the hole to keep the battery completely dry from any risk of water splashing up. Box internal design definitely taking shape now with that info ! :).
I remember seeing some nice water-proof/storm-proof strong nylon bags somewhere a while back I posted which are intended for putting inside your saddle/rack bag...ideal for protecting your battery/controller and any at risk connectors etc.. they came in a variety of sizes and were only cheap (starting at around £3-£4, made by a UK firm).
 
Last edited:

103Alex1

Esteemed Pedelecer
Sep 29, 2012
2,228
67
I remember seeing some nice water-proof/storm-proof strong nylon bags somewhere a while back I posted which are intended for putting inside your saddle/rack bag...ideal for protecting your battery/controller and any at risk connectors etc.. they came in a variety of sizes and were only cheap (starting at around £3-£4, made by a UK firm).
That sounds good, especially whilst I have them in a rack bag during testing (though I might confine tests to drier weather by choice it would be good not to have to bother about it so much). Let me know if you remember which thread you posted the link on.
 
D

Deleted member 4366

Guest
That sounds good, especially whilst I have them in a rack bag during testing (though I might confine tests to drier weather by choice it would be good not to have to bother about it so much). Let me know if you remember which thread you posted the link on.
Go down to the local sports shops and look at football boot bags. You should be able to get one like Saneagle's for £5.99. Take a piece of battery-sized polystyrene with you so that you can check the fit.
 

jackhandy

Esteemed Pedelecer
May 20, 2012
1,820
323
the Cornish Alps
I remember seeing some nice water-proof/storm-proof strong nylon bags somewhere a while back I posted which are intended for putting inside your saddle/rack bag...ideal for protecting your battery/controller and any at risk connectors etc.. they came in a variety of sizes and were only cheap (starting at around £3-£4, made by a UK firm).
Possibly kakers' dry bags - I've seen then cheap too.
 

103Alex1

Esteemed Pedelecer
Sep 29, 2012
2,228
67
^^ lol................
 

morphix

Esteemed Pedelecer
Oct 24, 2010
2,163
119
Worcestershire
www.cyclecharge.org.uk
I think those waterproof bags may have been Exped brand, they do a 1 litre size bag for under £6, but a quick search revealed there's a lot of inexpensive solutions for waterproofing electronic equip.. here's a couple for under £4:


Waterproof Camera Phone Pouch Case Bag Swimming Beach

SWT Waterproof Bag Wallet Case Cover for Ebook E-reader Amazon Kindle 3 3G WIFI: Amazon.co.uk: Sports & Outdoors

These might be too small for big batteries though and only suitable for smaller batteries, controllers and speedict etc.
 

103Alex1

Esteemed Pedelecer
Sep 29, 2012
2,228
67
I think those waterproof bags may have been Exped brand, they do a 1 litre size bag for under £6, but a quick search revealed there's a lot of inexpensive solutions for waterproofing electronic equip.. here's a couple for under £4:


Waterproof Camera Phone Pouch Case Bag Swimming Beach

SWT Waterproof Bag Wallet Case Cover for Ebook E-reader Amazon Kindle 3 3G WIFI: Amazon.co.uk: Sports & Outdoors

These might be too small for big batteries though and only suitable for smaller batteries, controllers and speedict etc.
Only thing with that type of pouch (I use them on boats) is that there's no exit for cabling when they are closed - they are dry pouches to seal up your phone etc. Any roll-top system will be the same (and that's the only system that's 99.9% effective on a drenching). A large zip-seal food bag from Tesco would be just as good as one of these with a cable compromising a total seal. To be completely honest a couple of plastic bags inside your rack bag is likely as good as anything - and free :).
 
D

Deleted member 4366

Guest
You don't have to make your bike 100% waterproof. You only need to make sure that the water doesn't fall on the connectors, and make sure you don't have compartments that can fill up with water, which means leaving gaps for the water to fall back out.

I've ridden my bikes in torrential rain, and there's great big holes where the wires come in, but no way for the water to accumulate where it can do any harm.

I poke holes in those football boot bags with a hot soldering iron to make holes for the wires. Here's my main bike. The zips aren't even waterproof, but I've never seen the rain get in.
 
Last edited by a moderator:

103Alex1

Esteemed Pedelecer
Sep 29, 2012
2,228
67
Just thought I'd update this thread whilst I still remember and for future reference. After trying the charger on the battery following rewire and (eventually) getting out to test the working bike it was clear it wasn't accepting charge from the charger.

To cut a story short, with d8veh's guidance put multimeter across charger pins on 200V DC setting and these looked like they'd been wired up with +ve and 0V the wrong way round when compared to the battery, which after sever hours 'charging' and after replacing fuses in the charger was by now showing 8V with positive female terminal in correct position for XLR wiring convention.

The charger wires are brown and blue, and there was a female stock kettle plug on the charger before I swapped the male/female polarity on both battery and charger and fitted replacement connectors. After multimeter testing it was clear that the manufacturer (Ecitypower) had originally fitted kettle plug female to charger with +ve indicator on female terminal that was wired up to a brown 0V wire. They had connected a blue 'live' wire to the female plug terminal indicated as -ve.

Just goes to show you really must test polarity with a multimeter and cannot go by either plug markings or wire colours when swapping out connectors.

I swapped the wires in the charger XLR so that blue was on +ve coupling and brown was on -ve coupling to battery. Re-did all the shrinkwrap and got it a bit tidier this time. Also resoldered the connections on the battery XLR female socket to get them a bit tidier whilst I had the soldering iron out, now I've speeded up a bit ! Making sure the wires never touch - as always.

The 20Ah 36V battery has since started accepting charge fine and was about 85% charged (using multimeter reading of 42V as indicating fully charged and 36.4V as about 85% of that) after 2hrs 20mins. Another hour or so and it should be full.
 
Last edited:

Alan Quay

Esteemed Pedelecer
Dec 4, 2012
2,351
1,076
Devon
Just to further you understanding a bit Alex:

Strictly speaking, DC should be designated as Black/Red (or sometimes White/Something bright) for 0v/+ve respectively. Often though, it is more practical to use AC designated cable (Blue/Brown). When doing so, I would get into the habit of using Blue for 0v, and Brown for +ve. That way you stand less chance of getting confused if you have an AC/DC transition, and if you have to swap between the two.

As for battery state of charge (SOC), the 'Nominal Voltage' (In this case 36v) indicates something around 20-50% SOC. It varies with technologies, but the amount of energy contained in the battery will not be linear with voltage, and certainly not across the full 0-42v range.

Your battery at 36.4v is more likely to be around 20-30% charged (at a guess).

Hope that helps.
 
D

Deleted member 4366

Guest
The problem was that Alex followed this convention but our Chinese friends had wired the charger in an unconventional way. The +ve charger lead was blue and wired to the "N" on the Kettle plug. The -ve was brown and wired to the "L" on the plug, so it was very easy for Alex to wire his connector back to front. I keep saying that whenever you get a new battery or charger, you should always confirm polarity with a meter. In this case Alex was lucky that only the fuse blew, but I know others that have blown their BMS and/or charger. I'm presently trying to fix another forum members battery and charger when the same thing happened, but this one will be more expensive to fix.
 

103Alex1

Esteemed Pedelecer
Sep 29, 2012
2,228
67
In this case Alex was lucky that only the fuse blew, but I know others that have blown their BMS and/or charger.
We know the battery charger's OK now. How would I know if I'd blown or damaged the BMS ? Would the battery just not charge at all ?

I keep saying that whenever you get a new battery or charger, you should always confirm polarity with a meter.
... and looking back over the post you did say to check with multimeter, explained how to do it and I seem to remember checking .... but from the misty haze of passed time I think it was only the blooming battery I checked and not the charger. Another lesson sunk in hopefully without terminal losses ! Must admit when the multimeter first arrived just before doing this job I had not the feintest clue what any of its output meant. I have a slightly better understanding now !!!
 
Last edited:

Alan Quay

Esteemed Pedelecer
Dec 4, 2012
2,351
1,076
Devon
The problem was that Alex followed this convention but our Chinese friends had wired the charger in an unconventional way.
Yes, but I'm suggesting that Alex would be better to fix the unconventional connector, rather than change his setup to match it. This may be a PITA but its likely to save a lot of trouble down the line.

Currently, Alex appears to have a bike where Brown is 0v, and blue is +36v.

Red to Red, Brown to Brown and Blue to Fxxking bits springs to mind!
 

Old_Dave

Esteemed Pedelecer
Sep 15, 2012
1,211
2
Dumfries & Galloway
Some times.... Convention can be a right PITA, lol

There is a good excuse for not following it when using leads/connectors for battery voltage instead of their normal mains voltage, and that is cos it's always possible to accidentally mix up one that's connected to the mains with the other one that's connected to the battery.

One trick is to use the male / female connectors the wrong way around, the other way is to wire the plugs and sockets to use N & E, this way no harm should happen if there was a mix up

Their use of the colours for + and - is a trap that we all fall into, but as D8veh says.... Always test ,


Sent from my iPhone using Tapatalk
 

jackhandy

Esteemed Pedelecer
May 20, 2012
1,820
323
the Cornish Alps
Just my two-penn'orth....If you're going to leave it as is.....

I'd be inclined to put a bit of red insulating tape round the body of that xlr, with clear indication that it's non-standard.

I had 2 batteries using the same charger, but wired differently at the pins: I could always remember that I'd changed one, but not necessarily Which :rolleyes:

Just on the offchance that someone might, one day, use that charger (maybe at a Cyclecharge Chargepoint) for a Powabyke "Can I use your charger?"....

"Yes, sure"....BANG!

My memory is deffo not wot it used to was :(
 
Last edited:

103Alex1

Esteemed Pedelecer
Sep 29, 2012
2,228
67
I have a colour coded Neutrik male on the charger which only fits 3-pin XLR socket and has a special grey bushing to signal it's for my silver bike. You can see it in post 14. Can't be mixed up with anything else.

I'm not opening up the charger to swap round the wires internally within it (risks doing more damage I fear !) - in truth it matters not what colour the wires are within the insulated lead coming out of it as long as they're wired to the right pins on the connector.

I have wired the +ve and -ve following the XLR wiring convention (pins are numbered 1,2 and 3) and the battery also follows that convention. The problem before was that I thought brown was +ve and blue 0V on the charger lead but it was in fact the other way round according to multimeter so manufacturer had wired the lead in reverse.

I now have +ve on the +ve XLR pin and 0V on the -ve XLR pin on the charger lead (XLR convention) so I'm happy with that. The colour of the wires feeding those pins can only be seen by disassembling the XLR connector itself. I won't be borrowing anyone's charger or lending mine out without using a multimeter on both connections first that's for sure after these experiences !!
 
Last edited:

103Alex1

Esteemed Pedelecer
Sep 29, 2012
2,228
67
Yes, but I'm suggesting that Alex would be better to fix the unconventional connector, rather than change his setup to match it. This may be a PITA but its likely to save a lot of trouble down the line.

Currently, Alex appears to have a bike where Brown is 0v, and blue is +36v.

Red to Red, Brown to Brown and Blue to Fxxking bits springs to mind!
Mike, the battery is fine - red is +ve and black is 0v. The socket accords to this. I've just had to swap the charger wires so blue goes to red and brown to black. No way round that other than to open up the charger and reverse the manufacturer's wiring within the body of the charger. 3-pin XLR connectors have a 1-2-3 numbering on the pins. On a connection with no 'earth', 1 is 0V and 2 is +ve. The middle 3rd pin is not used. Both battery and charger are wired up following this connector numbering convention now.

It's not the connector wiring I've done that's unconventional it's the charger lead. So this has now been wired up to have a conventional male connector which matches the battery - which I had correctly wired up to female XLR socket according to DC convention (and manufacturer had supplied with conventional DC wiring orientation on the original kettle plug).

If you're confused I'm not surprised - I think most people will be by now lol. Multimeter probes. Only way to ever be sure. That's the lesson well & truly taken on board !
 
Last edited: