Swapping male / female terminals on battery and charger

103Alex1

Esteemed Pedelecer
Sep 29, 2012
2,228
67
Hi.

Am about to rewire my battery and charger with XLR connectors. Had some stock-out issues to work around and have got some to try. Only thing is that at the moment, the charger has a female and the battery has a male kettle plug connector.

I want to put a male XLR connector on the battery charger and a female with socket adaptor on the battery lead. Swapping them around in effect. Is this OK to do ?

Edit - Just to note the battery / controller connection has already been rewired to Deans connectors so there is no chance of connecting the wrong wire to the charger or controller.
 
Last edited:

Old_Dave

Esteemed Pedelecer
Sep 15, 2012
1,211
2
Dumfries & Galloway
Convention says that the 'female' connector goes to the 'live' side of the connection.... Or the side that will do most damage if the pins are shorted


Sent from my iPhone using Tapatalk
 
Last edited:

103Alex1

Esteemed Pedelecer
Sep 29, 2012
2,228
67
Lol. But does convention have to be followed ? Interestingly my Kalkhoff battery has a female socket on it and the charger a male (but then they drive on the wrong side of the road too !) ... so I kind of thought it should be OK in principle but as per usual just want to make 100% sure before I go cutting connectors off my charger !
 

Old_Dave

Esteemed Pedelecer
Sep 15, 2012
1,211
2
Dumfries & Galloway
If the battery side of the charging connector is 'live' then follow convention ( cos its convention) and fit the female socket to it ....


Sent from my iPhone using Tapatalk
 

103Alex1

Esteemed Pedelecer
Sep 29, 2012
2,228
67
If the battery side of the charging connector is 'live'
If I can choose then we'll call this side 'live' and I can be conventional for once !

If you'd asked me on a Tuesday I'd have said ...... Yees ;)

and fit the female socket to it ....
Like :) ... coz that's what I'm doing lol. The male plug is going on tonight, the female on the battery tomorrow when the blooming socket connector cover boot off e-bay turns up in the post. 5 separate parts from 2 sources for one connection. It's bonkers - but should be a nice result and the nifty thing is I can use the female battery side connector without the chassis plate until my box is ready and fit it in to the plate later ... even got to choose the colour of the boot on the male connector to match the bike lol. :p
 
Last edited:

103Alex1

Esteemed Pedelecer
Sep 29, 2012
2,228
67
Well ... I've swapped the battery charger connector over. Few piccys just for interest's sake ...

The starting point ... I'm removing the female connector on the right (charger) and fitting a different male connector in its place :

20130208_003010[1].jpg

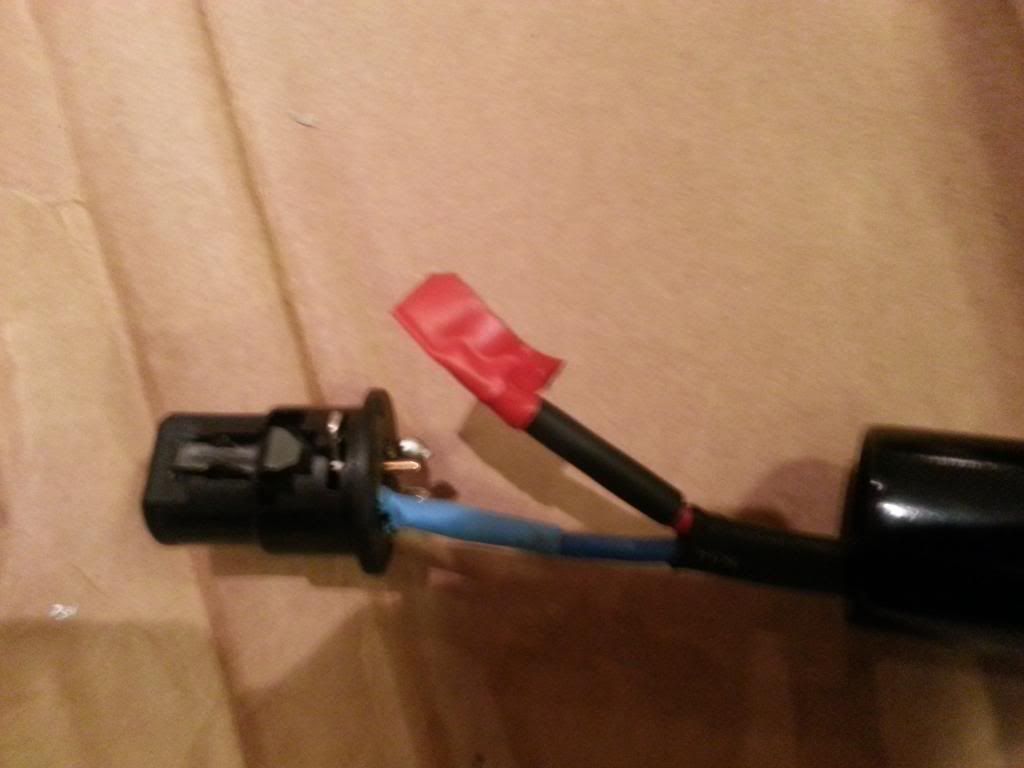
It's moulded in and best cut off. I decided in my inexperienced wisdom to cut it open with a stanley knife ... and about 20 minutes and much blue smoke it collapsed to this :rolleyes: lol :


I wanted to be completely sure the wire colours and terminals matched what I thought they would - but it was blue and red inside matched to N & L as you'd expect.

This is the new connector exploded .. the grey colour-coded bushing is an extra part for 8-10mm cables (the flex is 7.5mm but fits perfectly) - fitting comes with a black one as standard intended for cables up to 6mm (on the right) which I've just swapped out and kept :

20130208_002935[1].jpg

The bushing is available in a load of different colours - might be nice if you have different chargers for different batteries or stuff like that. I chose it in grey because the bike is Aluminium and this matched up nicely.

XLR connectors have an odd coding where 1 = ground, 2 = +ve and 3 = -ve. The product assembly instructions online don't tell you this but I found out from a Youtube "how to" video. The wire gets stripped only 4mm and 18mm of outer cable is removed. The cups are really tiny and it's a precision job to seat them really well.

I don't have a clamp yet so improvised with a bit of cardboard after 3 failed attempts to seat the wires, desoldering and re-tinning (and a singed finger & thumb tip !!) ... eventually folded up a large piece of cardboard, cut a cross-slit in it and pushed the connector to be soldered inside to keep it steady. Then held soldering iron with right hand using right elbow to keep the flap with the connector up & steady, leaving left free hand free to hold the wire and seat the tiny unsheated tinned wires in their cups :


It worked really well and got a very clean join with wires pushed well into their cups.

Here's the finished connector - looks much smarter I think, and more importantly allows me to plug into a panel socket attached to my battery for 'on bike charging' down the line :


Happy with that.

I'll remove the male kettle plug and fit the female XLR socket connector to the battery tomorrow - just waiting for an extra part to protect the terminals when it's housed in my bike which needs to be put on before it gets soldered on.
 
Last edited:

jackhandy

Esteemed Pedelecer
May 20, 2012
1,820
323
the Cornish Alps
My ezee battery has xlr socket for charging, as did the missus' powabyke battery:

But the pins were wired differently, so beware of that if you ever charge other batteries, or use a different charger on yours.

I swapped the pins on one & it had red tape & dire warnings on it!

That was the one wot died a couple of weeks ago - Nothing to do with the modification - It got wet :(
 
D

Deleted member 4366

Guest
Before you connect the charger, you MUST check each side with a meter to make sure the wires are the right way round. You can't go by colours or markings.

Don't forget that the battery charge connector is live. I can't remember seeing a fuse on it when I opened up Saneagle's battery, so you must be very careful not to let the wires touch or let any cutting tool touch both wires at the same time.
 
Last edited by a moderator:

103Alex1

Esteemed Pedelecer
Sep 29, 2012
2,228
67
My ezee battery has xlr socket for charging, as did the missus' powabyke battery:

But the pins were wired differently, so beware of that if you ever charge other batteries, or use a different charger on yours.

I swapped the pins on one & it had red tape & dire warnings on it!

That was the one wot died a couple of weeks ago - Nothing to do with the modification - It got wet
Yup .. good point. They do all differ - some use connections with 1-3-2 pins and others 2-3-1. That is assuming they've been wired correctly according to pairing standard.

I've fitted a 3-pin system to this one (there's no earth wire in the core on the ECityPower chargers so it's just a dummy) but for instance my Kalkhoff battery one has a 4-pin socket and a different XLR fitting on the charger. I'm leaving the Kalkhoff stuff alone .. warranty voiding and all that ;)

It's kind of one of the reasons I bought the colour coded bushing for this - so if I get other similar looking chargers / batteries in future for different bikes I can fit different coloured systems for them, and if I get a new battery for this one the fitting will be moved on to it (or a similar one put on). It will make absolutely sure I think about it anyway !

That was the one wot died a couple of weeks ago - Nothing to do with the modification - It got wet :(
:( .. was that the charger housing that got water in it ? I guess the charger has to be in a dry bag if you carry it about.

It's that sort of reason why I'm so paranoid about waterproofing all my connectors as best I can. Gonna be in Devon with this one and everything is wet down there most of the time and certainly all Summer lol.

Got some nifty covers for the socket on the battery for pennies. I'll put some pics up when I wire it up :).
 

103Alex1

Esteemed Pedelecer
Sep 29, 2012
2,228
67
Before you connect the charger, you MUST check each side with a meter to make sure the wires are the right way round. You can't go by colours or markings.

Don't forget that the battery charge connector is live. I can't remember seeing a fuse on it when I opened up Saneagle's battery, so you must be very careful not to let the wires touch or let any cutting tool touch both wires at the same time.
Yup .. it'll be sealed when not in use. I'll be as careful as I was when changing the kettle plug for Deans, insulate each wire before connecting the other and make sure no solder drips which might cause any shorting.

I've registered not to make any assumptions about Chinese wiring ! The multimeter turned up yesterday so I'll run a test on it in a bit. Do I just hold the red probe on one terminal and see which one registers a current ?
 
D

Deleted member 4366

Guest
You first have to select the right scale on your meter. Turn the knob to 200 volts DC. Then you put one probe on one wire and the other probe on the other wire. If it shows + 42v, the red probe is on the +ve wire. If it shows -42v then the black probe is on the +ve.
 

103Alex1

Esteemed Pedelecer
Sep 29, 2012
2,228
67
Right, christened the multimeter and established that red was +ve and blue was -ve using that guidance - many thanks.

So .... did the other side of the connection today too.

New components finally assembled to let me get on with it after a postal delay on the rubber boot which is to protect the whole connection (part on the left sourced from a different supplier) :


Old connection disassembled for desoldering - insulating whicever pin now being worked on at all times :


Wire ends reheated and retinned to make sure of a good connection :


Connector pins tinned, VERY carefully checked for coupling to male connector on charger the right way round and soldered on one at a time keeping the other wire insulated. The shrinkwrap on the completed solder joint keeps this shielded whilst the other one is done :


103Alex1

Esteemed Pedelecer
Sep 29, 2012
2,228
67
Soldering done - I'm getting more used to this now ! :


Slotted into chassis mount plate and protective boot pulled up over the connection for a nice tidy finish and added protection :


This little cover plug protects the terminals if you're out and about with the connection in a bag, and is an extra part (the chassis plate can actually be taken off and the connection still couples fine to the charger - it's there for when I mount the battery in my box to provide an external socket) :


... but the final assembly when this gets built in will have one of these housings instead ...


or a different one I have on back order which looks more like this and is due to follow next week which I think is likely to be stronger for use on a bike box.

SCDF - Neutrik

I'll decide which to keep and use when I've seen them both and send the other back or keep it as a backup. It's very hard buying things out of catalogues as you can't actually test them to see how well they're likely to perform in different applications to the ones they were built for (in this case sound equipment panels).
 
Last edited:

103Alex1

Esteemed Pedelecer
Sep 29, 2012
2,228
67
Pretty blooming chuffed with this looks-wise and it'll be even better when the battery is boxed away. Let's hope it works after all that (!) Battery was basically fully charged up so not sure what to look for but connected the charger to the battery and it all looks OK. Charger showing one red and one green light as it did before I changed the connectors :


Only thing is the fan isn't going like it did when I first got it and plugged the battery in to fully charge up... anyone know why ? Does it only come on if the charger detects there is a full charging load rather than a trickle charge needing to be output ? It's an Ecitypower (P/N:EMC-180) LiPo 200-260V, 36V 4A version. Other than this, I think that's a wrap on this one :)
 

NRG

Esteemed Pedelecer
Oct 6, 2009
2,592
10
The fan will only come on as the charger heats up during the charge cycle. If the battery is already charged then the charger is not going to get hot...neat work BTW!
 
D

Deleted member 4366

Guest
That's a good job well done Alex, and saves you fron what I did the other day. The charger was on the floor where I park the bike. I bent down to pick up the kettle-type charge connector and plugged it in to the battery, and then noticed that the fan didn't come on. I then checked the LEDs and noticed that they were both off. What's going on, I thought?

The maind kettle lead had fallen out the back of the charger, and it was that one I'd plugged directly into the 36v battery. I suddenly got a very cold feeling and whipped the connector out as quickly as I could - a bit pointless because it had been in for about 30 seconds.

So what happens when you plug 230v into your 36v unfused charginng lead? Luckily no danage to the battery, but the fuse in the charger plug blew as well as the one in the 4-gang extension lead - both 13 amps.

Now I wouldn't recommend kettle plugs for chargers. It's certain to happen again. I was lucky. Damage could have been very very severe.
 

Old_Dave

Esteemed Pedelecer
Sep 15, 2012
1,211
2
Dumfries & Galloway
Now I wouldn't recommend kettle plugs for chargers.
Good point Dave

An 'almost perfect' :rolleyes: fix using iec connectors is to alter the gender of the plug / socket connected to the battery to be the same as that used on the charger mains lead and visa versa on the charger charging lead

So ...
mains to charger would be female (safe convention applies)
charger towards battery connector would be male
battery connector to battery would be female

Female to Female don't fit nor does Male to Male (for the purposes of this event :D)
 
Last edited:

jackhandy

Esteemed Pedelecer
May 20, 2012
1,820
323
the Cornish Alps
:( .. was that the charger housing that got water in it ? I guess the charger has to be in a dry bag if you carry it about.

:).
No, water got into the battery case & shorted the bottom cells. I had mounted the battery low down on the front of the diagonal, on the bouncer, and water must have splashed up from puddles. It wasn't even a wet day, but there you go.
I now have a frog right up tight under the saddle. (It gets wet down here, too)
 

morphix

Esteemed Pedelecer
Oct 24, 2010
2,163
119
Worcestershire
www.cyclecharge.org.uk
If the battery side of the charging connector is 'live' then follow convention ( cos its convention) and fit the female socket to it ....


Sent from my iPhone using Tapatalk
I agree with Old Dave, better safe than sorry.. the live side should be female to cover all bases.. what if you forget else and short it, or your fingers touch it? unless you plan to have an in-line power switch/fuse or something..

Interesting thread anyway Alex and great pics.. I'm about to look at wiring options myself (including power connection) on my Mezzo build.. I'm putting in a Speedict which takes power directly so I might adopt your approach I think and use smaller neater XLR connectors rather than the standard kettle type. I have a couple laying around as I ordered various connectors from BMS with my kit.

I wish the battery manufacturers in China would put longer leads on their batteries!! It's crazy they put like 5-10cm of cable and a big kettle connector eh!
 
Last edited:

morphix

Esteemed Pedelecer
Oct 24, 2010
2,163
119
Worcestershire
www.cyclecharge.org.uk
Pretty blooming chuffed with this looks-wise and it'll be even better when the battery is boxed away. Let's hope it works after all that (!) Battery was basically fully charged up so not sure what to look for but connected the charger to the battery and it all looks OK. Charger showing one red and one green light as it did before I changed the connectors :


Only thing is the fan isn't going like it did when I first got it and plugged the battery in to fully charge up... anyone know why ? Does it only come on if the charger detects there is a full charging load rather than a trickle charge needing to be output ? It's an Ecitypower (P/N:EMC-180) LiPo 200-260V, 36V 4A version. Other than this, I think that's a wrap on this one :)
Very neat job! You have the exact same charger and battery as me :D Is that a 10ah?

How long you had your battery now? I've had mine at least a year I think and it's still as strong as the day as I bought it!