Grind crank arm or new BB

waj1234

Pedelecer
Feb 20, 2013
117
17
Currently fitting a MXUS XF08C kit from Woosh.

Ran into problems immediately which seems normal. I need to buy a grind tool for my drill today so I can make the dropouts deeper as it does not sit deep enough currently. The disc does still skim the disk pad slightly so may need to do something with that too.

I am waiting for delivery of some riv nuts as will need to fit 2 of em. Shame these are not included in the kit since you nearly always need some. Also waiting for some torque arms just for piece of mind really.

I had to buy some Hydraulic brake sensors elsewhere as woosh does not supply them in the kit or as an option. Got them from here in UK with quick delivery - http://wing-ebikes.co.uk/?page_id=3002

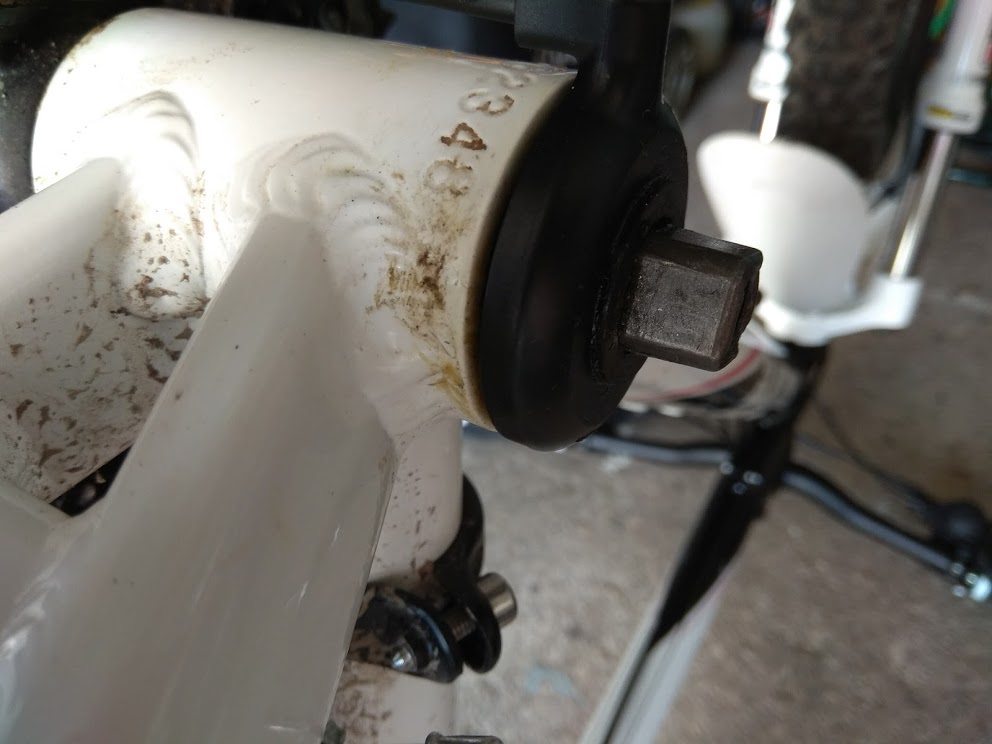
Another problem is there is not enough room for the left brake sensor and the crank arm will squash/crack it so I either need to grind some off the inside of the left crank arm or get a longer spindle bottom bracket.

I am not sure if I get a longer BB if the chain rings will be out of line with the cassette to gain a longer left side? Can you get them with a longer left side only? Or will it be ok just grinding around 5mm of the arm?

I think the 3 hour time guide is a bit off unless you do one a week and know what to expect and instructions should mention grinding dropouts etc too as its not something most people will be fitting often or before even if you are competent etc. Its probably gonna take me more like 12 hours lol.
 
  • Informative
Reactions: Woosh
D

Deleted member 4366

Guest
If the disc touches the frame or caliper mount, you put a washer on the axle. I don't think I've ever fitted a rear motor without needing a washer there.

The Hailong 08 shark batteries have their mounting slots in the wrong place (too far up), so you nearly always have to put new rivnuts in the frame.

You need a gap of at least 3mm to fit a pedal sensor. I often remove the inner thicker bits from the magnet disc to get it down to about 3mm thick. If it's a square taper crank, I then remove whatever is necessary up to about 3mm from it to make space for the disc. 5mm sounds a bit much. A longer BB does affect both sides. If you want to go that route, you need to check that the front derailleur will go further out. Many won't.
 

Woosh

Trade Member
May 19, 2012
20,451
16,916
Southend on Sea
wooshbikes.co.uk
can you post some pictures of the motor wheel in the dropout and the bottom bracket with the left hand pedal sensor - that will help everyone interested to see the problems.
 

waj1234

Pedelecer
Feb 20, 2013
117
17
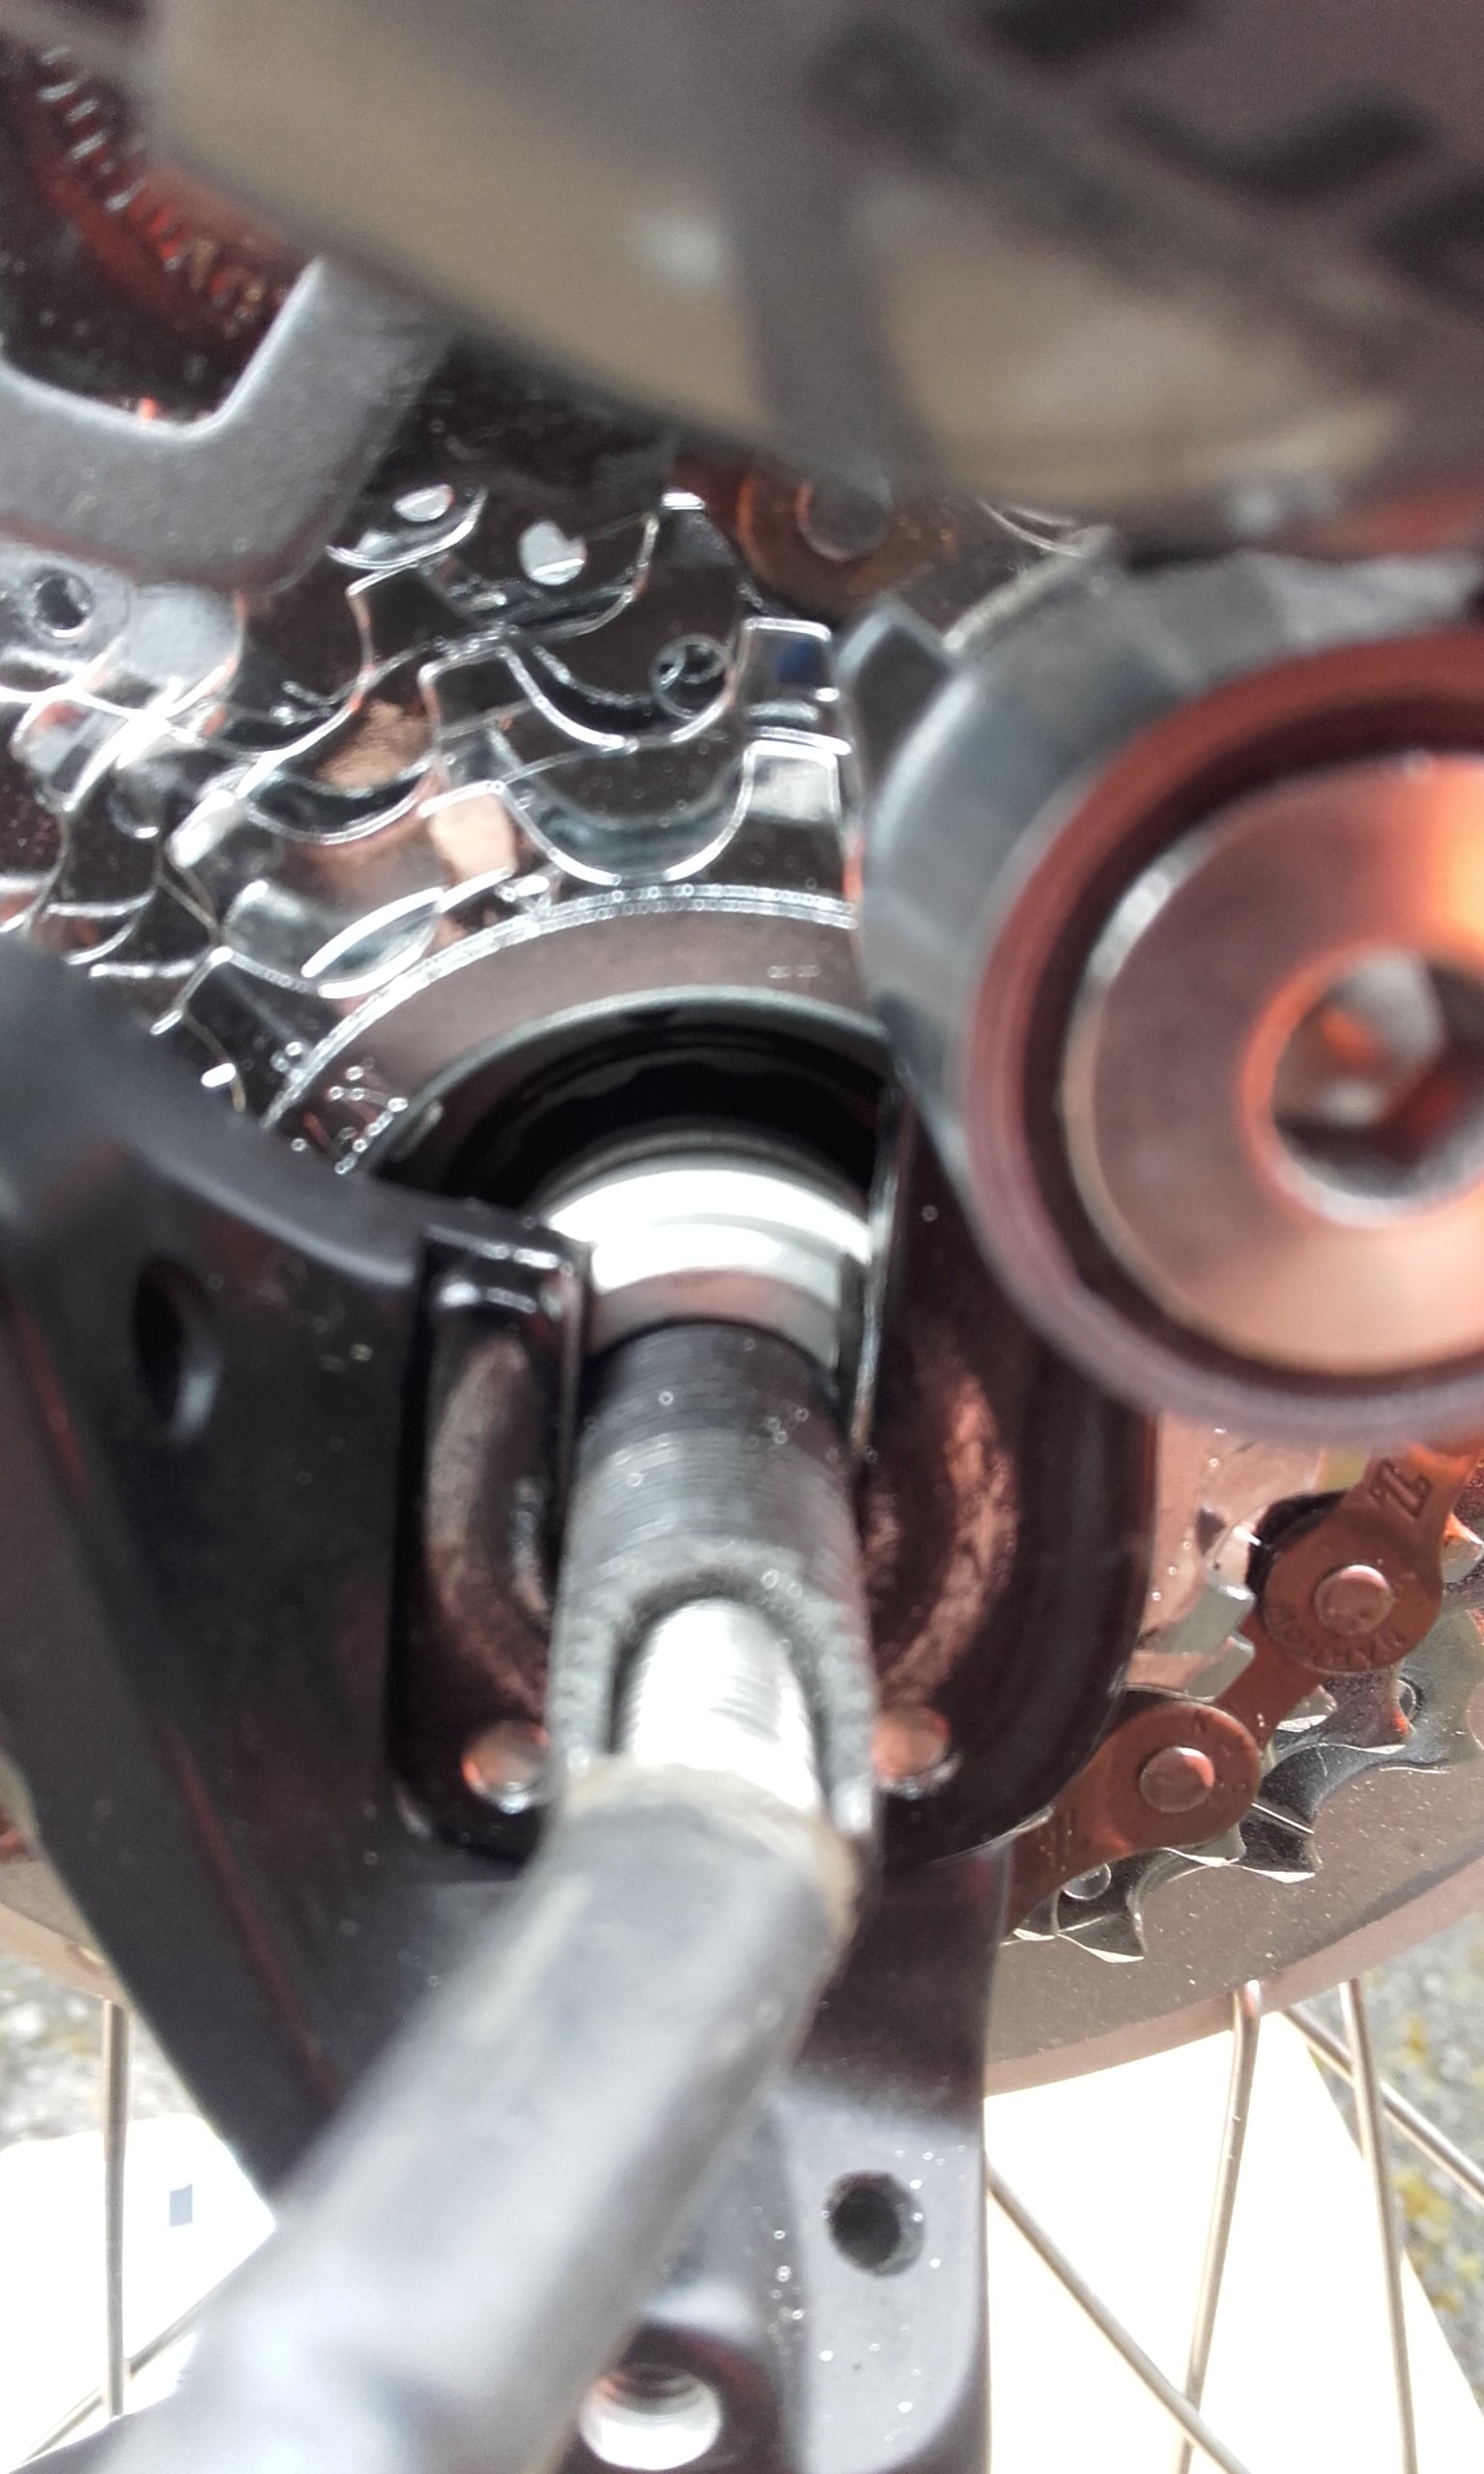
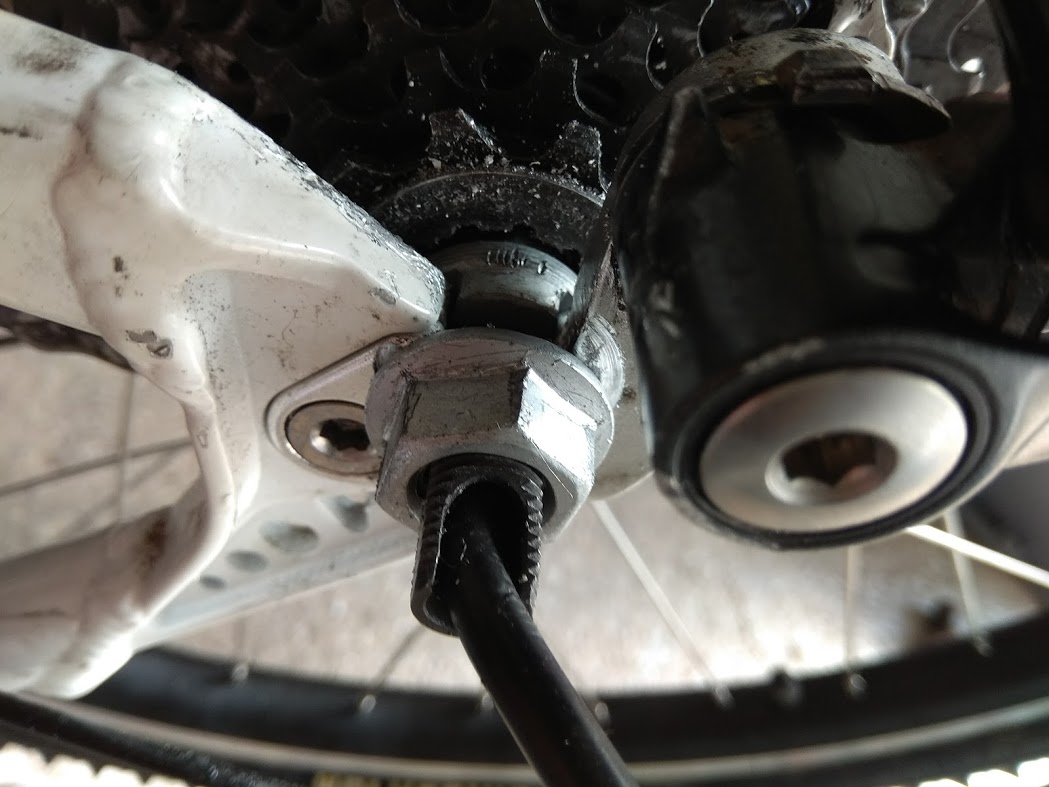
Pictures on this link - https://photos.google.com/share/AF1QipOLt6l9eRVemBD3vmpsn5Fwr0nIK3su8xout0tk3IzYmS_2scBujGv_EsbEBotYqg?key=dUJjQ2tPQXZXeGFwUV9uSkVRWjZQUU5LbWk2dkdR

It may not need as much as 5mm as was just an estimate. Not sure the sensor provided could be made any thinner?

Already got a washer on disc side so will need to play with different thickness as 2 it goes too far and 1 not enough etc.

You can see pics of dropout in link, the disc side sits lower than the cassette side as you can see but neither go low enough anti spin lock washer to do its job.

Still think I will need to shave some of crank arm and I have bought some mini grind bits for the dropouts though will have to make sure they are level so a little at a time I think.
 

Woosh

Trade Member
May 19, 2012
20,451
16,916
Southend on Sea
wooshbikes.co.uk
you need to make the slot in the dropout about 2mm-3mm deeper, so the anti-rotation washer can be completely inside the dropout like this:


It may not need as much as 5mm as was just an estimate. Not sure the sensor provided could be made any thinner?
The rubber seal is not strictly needed, its main job is to protect the sensor from water ingress.
The main thing is to get the sensor to key into the left cup of the bottom bracket as much as you can without using too much force.

Can you check how much of the spindle you have left for the crank to go back on?

 
Last edited:

waj1234

Pedelecer
Feb 20, 2013
117
17
you need to make the slot in the dropout about 2mm-3mm deeper, so the anti-rotation washer can be completely inside the dropout like this:

On with that now. Got pedal sensor fitted after I ground down crank arm around 3 or 4 mm
 

waj1234

Pedelecer
Feb 20, 2013
117
17
It's more like 5 mm to be honest as the dropouts are not that deep. I have killed 3 grin tools already to go about 2 mm
 

Woosh

Trade Member
May 19, 2012
20,451
16,916
Southend on Sea
wooshbikes.co.uk
I usually file it with a small round file before grinding.
 

waj1234

Pedelecer
Feb 20, 2013
117
17
Right the wheel is now fitted and without catching the disc. Pics - https://photos.app.goo.gl/YRtICOEemykVSHUv1

Now another question. There is not much room on handlebars so considering removing the front derailer controls mainly as its always on top ring anyhow and rarely use the 2 smaller ones. What is the best method of keeping the front derailer in place as a chain guide and ditching the control and cables?

Edit - Forget that will just move ir out of way.
 
Last edited:
  • Like
Reactions: Woosh

Woosh

Trade Member
May 19, 2012
20,451
16,916
Southend on Sea
wooshbikes.co.uk
the right dropout does not seem to be as snug as the other one.
You may need to add a 12mm torque arm (not 14mm) to that side.
Don't forget to slide the metal coil spring back about 5mm into the motor axle.


waj1234

Pedelecer
Feb 20, 2013
117
17
It's not quite as far in no but I have some torque arms in post already.

Fitting the throttle is a pain too as it either gets in way of gear changer or it's too far away from the grip to use. I may have to and remover the front gear changer and lock front derailleur or get a chain guide to replace it.
 

Woosh

Trade Member
May 19, 2012
20,451
16,916
Southend on Sea
wooshbikes.co.uk
Put the throttle on the left hand side for now. I'll ask Andy for a new Wuxing one later when he gets back from his lunch break.
 

waj1234

Pedelecer
Feb 20, 2013
117
17
It is on the left now. It gets in way of gear levers which ever one it goes on so I have removed my front derailleur now to make way. Top ring will be fine alone now its electric I am sure. I may replace the crank to a single chainring one in the future. I will buy a chain stay thingy too.
 
  • Like
Reactions: Woosh

Woosh

Trade Member
May 19, 2012
20,451
16,916
Southend on Sea
wooshbikes.co.uk
as the front derailleur is seldom used, can't you just move the left shifter in a bit, so the throttle can occupy its place for now?
 

waj1234

Pedelecer
Feb 20, 2013
117
17
Not really as my bars get too thick nearer middle. It's gone now anyway all fully removed.

Next tricky bit is darling holes as wont be able to get my drill into the space so may need to go buy yet another tool lol.

Should have bought a complete bike as this is a ball ache. 3 hours my arse ha ha.
 
  • :D
Reactions: Woosh

Woosh

Trade Member
May 19, 2012
20,451
16,916
Southend on Sea
wooshbikes.co.uk
next bike you build, it won't take that long.
 
  • Agree
Reactions: D C

waj1234

Pedelecer
Feb 20, 2013
117
17
No idea how to position the hydraulic brake sensors on shimano levers. Any one got a pointer?

Would have been easier if I had cable discs so I could use the ones provided but its not gonna be that simple is it.
 

Tabs

Esteemed Pedelecer
Jul 1, 2016
279
132
64
Scotland
I fitted the throttle on the left-hand side beside the front shifter,the throttle is upside down and the shifter is in a strange position but since I only use it now and again it's not a problem,I think having the throttle on the left makes more sense cause it allows you to signal and use the throttle at the same time when turning right.
 
  • Like
  • Informative
Reactions: waj1234 and Woosh

waj1234

Pedelecer
Feb 20, 2013
117
17
It is on left and feel in an OK position. But it fits better with front gear changer removed so the derailleur has been ditched too.