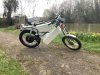
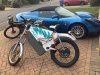
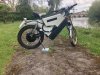
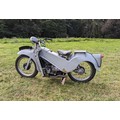
Hi all, I have had some requests to post a build thread, so I would like to share my build with you. It is based on a 1984 Puch Maxi S that I bought from a motorcycle auction in boxes with a registration document so it will be road legal. These mopeds are becoming difficult to find now, especially one that is registered and I didn’t want to butcher a good example so this was ideal for my project.
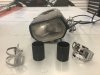
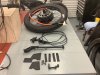
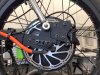
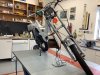
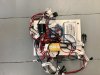
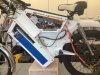
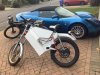
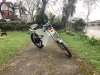
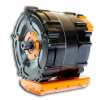
I have used a QS205 hub motor mounted in a 19” wheel and a MQ CON Sabvoton 72100 controller. The frame needed a rear fender chop to accommodate the wheel.
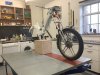
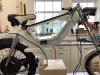
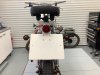
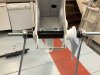
Here is the freshly painted frame with the rear fender chopped ready for the build. It was pretty scabby and I’m pleased with the result considering it was a rattle can respray in my garage on a cold winter day, so not the ideal environment for spraying a frame. But I managed to get a bit of shine on it with no runs or orange peel using an industrial acrylic spray paint.

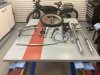
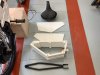
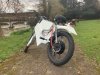
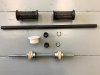
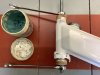
The first thing to do was to fit new headset bearing cups and pedal bushes. I’m replacing the pedal assembly with foot pegs.
I also fettled a 40mm plastic push fit waste socket to bung up the air filter hole and made a simple tool to press in the bearing cups instead of hammering them in.


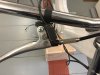
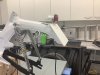
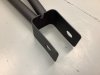
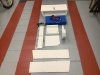
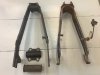
The next job was to fit a new swing arm. Here is a MLM race swing arm compared to the original. The MLM arm has a 130mm dropout and it needs to be 150mm to 155mm to accommodate the hub motor, so I made a jig to cold set one side at a time and to pull the axle flats back to parallel after stretching.
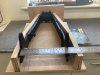
I have used a QS205 hub motor mounted in a 19” wheel and a MQ CON Sabvoton 72100 controller. The frame needed a rear fender chop to accommodate the wheel.
Here is the freshly painted frame with the rear fender chopped ready for the build. It was pretty scabby and I’m pleased with the result considering it was a rattle can respray in my garage on a cold winter day, so not the ideal environment for spraying a frame. But I managed to get a bit of shine on it with no runs or orange peel using an industrial acrylic spray paint.
The first thing to do was to fit new headset bearing cups and pedal bushes. I’m replacing the pedal assembly with foot pegs.
I also fettled a 40mm plastic push fit waste socket to bung up the air filter hole and made a simple tool to press in the bearing cups instead of hammering them in.
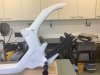
The next job was to fit a new swing arm. Here is a MLM race swing arm compared to the original. The MLM arm has a 130mm dropout and it needs to be 150mm to 155mm to accommodate the hub motor, so I made a jig to cold set one side at a time and to pull the axle flats back to parallel after stretching.
Last edited: